We all need to print something at some point. While we are always happy to help, we have worked to make this process as easy as possible for you as a self-service option. To add your printer, simply follow the instructions below.
Before You Begin
Before you start adding the printer to your Mac device you need to know the IP address of the printer and, potentially, the printer’s model number.
Additionally, how you add the printer is dependent on whether the printer requires a PIN or not. PINs are usually configured when devices are shared across multiple departments and are used to track printing/copying for billing purposes.
Without PIN
First, navigate to System Preferences -> Printers & Scanners and hit the “+” button, click on the globe icon at the top of the “Add Printer” pop-up window, and then type the printer’s IP address into the “Address” box (see the screenshot below).
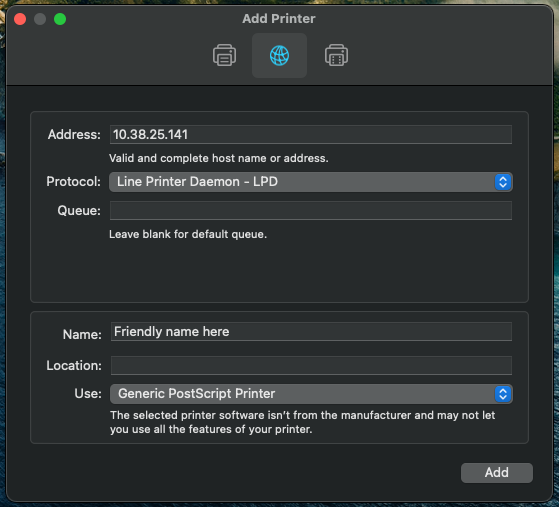
The “Protocol” is almost always “Line Printer Daemon – LPD”, but if after adding your printer it does not work, re-add the printer using the “Internet Printing Protocol” instead. (That isn’t necessary too often.)
The “Queue” field should be left blank.
The “Name” and “Location” fields near the bottom can be whatever you’d like to identify the printer. The “Name” will default to the IP address, so it is usually best to assign a friendly name like “Main Office Printer” or similar.
Lastly, the “Use” field can be left as “Generic PostScript Printer” for simple printing needs. However, if you need to print to non-standard size paper or utilize more advanced printer functions, then the driver will be necessary and should be installed.
With PIN
Xerox print drivers are required when MFDs are configured to require a PIN. You’ll need to download the “macOS Print and Scan Driver Installer” from the Xerox support site for your printer model. The web interface for some printers will link directly to the drivers needed (simply point to the printer’s IP address in your web browser). However, in most cases the web interface downloads Windows drivers by default and you must manually search the Xerox support site (enter the printer’s model and “macOS driver” in the search box).
After the dmg is downloaded, open it and run the pkg file. A xerox utility will run to guide you through the installation of the driver and connection to the printer (you do need administrative access to your computer).
At the “Select Printer” step of the Xerox install, select the “Don’t See your Printer?” button to manually connect to the printer (the auto discovery process will not work). Additionally, due to campus network configuration, the Xerox install will not be able to independently determine the model of the printer. You’ll have to select it from the dropdown provided.
After the Xerox install finishes your new printer is available. The first time you print to it, it’ll ask for the PIN and save it for future use.
You can also set default options for things like secure print, B/W vs Color, single or duplex printing, print quality, and more.