We all need to print something at some point. While we are always happy to help, we have worked to make this process as easy as possible for you as a self-service option. This process will also install the respective drivers for the printer on your computer.
Before You Begin
Before you begin adding the printer to your Windows computer you need to know the printer’s IP address and model number. Additionally, how you add the printer is dependent on whether your Windows computer is UFAD domain-joined (you can signing using your Gatorlink username/password) or not.
UFAD Domain-Joined Computer
Step 1: Find the Print Queue
Open File Explorer (the folder icon on the Task Bar) and type “\\tss-srv-print-2” in the address bar at the top of the window, as shown below.
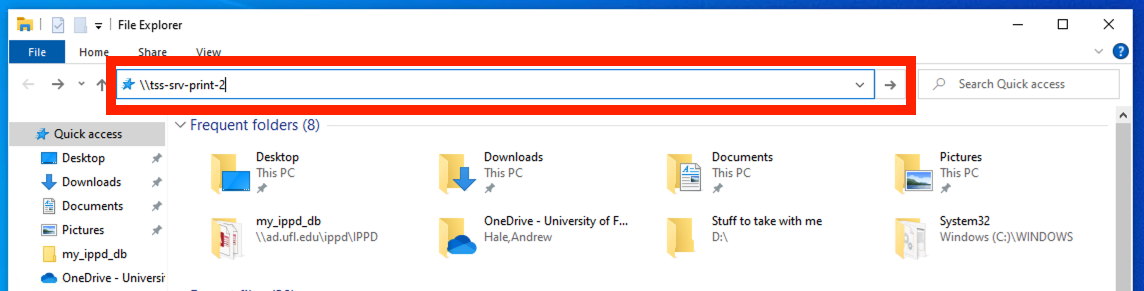
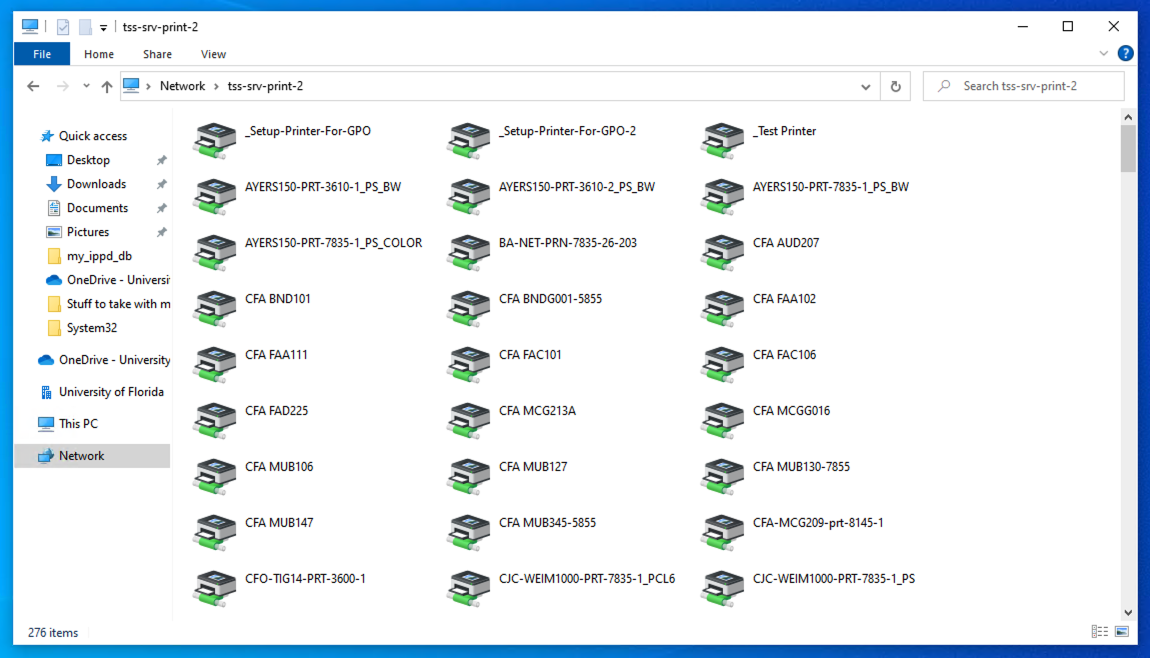
If you have typed that correctly, it should look like the screenshot below.
Step 2: Install the Print Queue
Most Engineering printer queues begin with “EG” or “ENG”. The print queue name follows a standard that includes the building abbreviation, room number, and printer make/model. So finding your printer within the list should be easy if it wasn’t provided to you. Something else to note, color printers also usually have two queues: a black-and-white queue and a color queue.
Once you find the print queue you wish to add, double-click on it to connect. With our group policies in place, the necessary drivers should automatically be added to your computer. However, if you are prompted for an Administrator’s username & password, and you do not have one, please let your local IT support team know.
Step 3: Set Printer Defaults
The print queue for that printer will open when the server has finished adding the printer to your PC. It will look like the image below. From the “Printer” menu you can choose “Printer Properties” to set default options such as duplex printing, paper trays, print quality and other things.
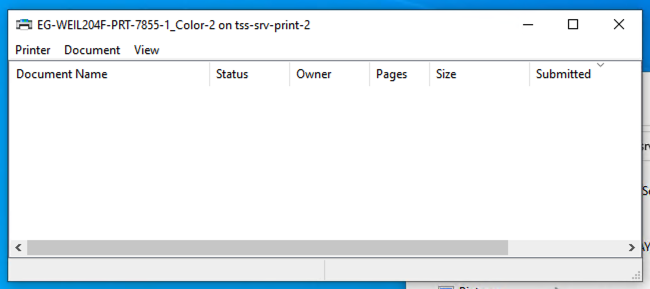
Please note: some color printers do not have two queues. In those instances, it is usually best to set “Xerox Black and White” printing to default so that you do not have to remember to use the cheaper of the two printing methods.
non-UFAD Computer
What if your Windows PC is not joined to the UF domain (UFAD)? At that point, you must add the printer via direct IP printing. Instructions vary based on the version of Windows… please view these instructions from Microsoft Support: Install a printer in Windows – Microsoft Support.
If the printer is configured to require a PIN (or you need access to advanced Xerox finishing features like Secure Print), you must, however, install the Xerox print driver and run the Xerox install utility (administrator access is required). This utility tries to automatically discover and identify your printer. Unfortunately, UF network configuration prevents this from working properly so you have to manually connect to the printer via its IP and choose the model from a dropdown list.
Obtaining the Printer Drivers
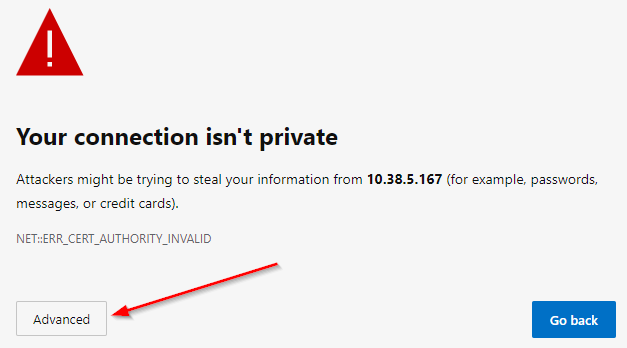
Most Xerox PrintSmart printers have a web interface that is accessible from any web browser. This interface provides basic information about the printer as well as easy access to download printer drivers. So, the easiest way to obtain drivers is to browse to the printer’s IP address in Chrome, Firefox, or Edge and look at the printer’s homepage for a driver download link.
Unfortunately, however, most printer webpages use a self-signed certificate. You’ll likely have to bypass a security warning that usually hides behind a button on the warning page.