 NOTE: These instructions work for Outlook (Classic) ONLY.
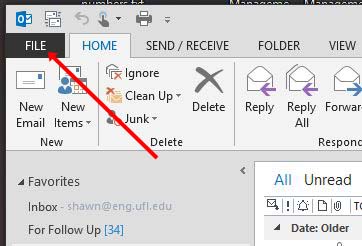
Adding an additional mailbox in Outlook is very similar in most versions of Outlook. The screenshots included here are from Outlook 2013. First, open Outlook 2013 and click File from the ribbon (pictured).
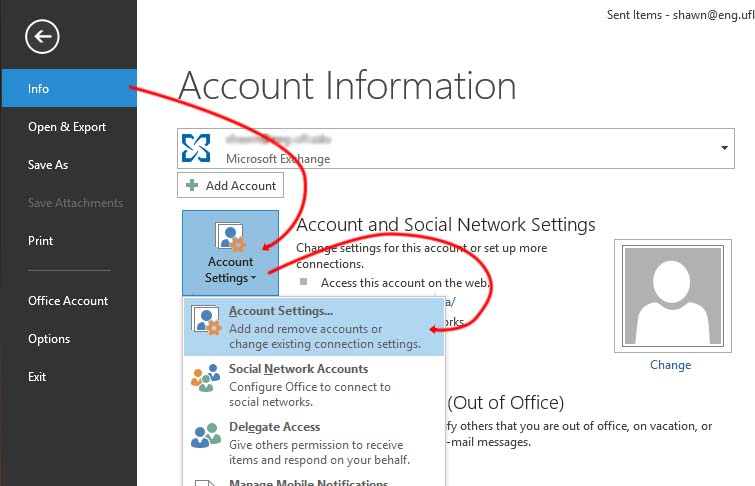 Once the File menu (pictured) is displayed click Info in the upper left and then the Account Settings button. In most instances you are already on the Account Information menu when you get to here. A dropdown menu will appear from the Account Settings button, from this choose Account Settings… again.
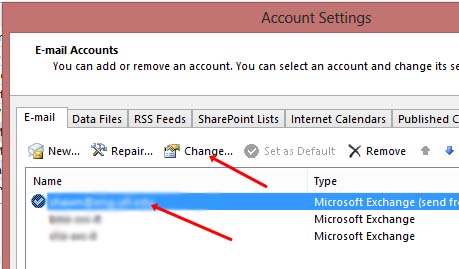 Once in the Account Settings dialog (pictured) highlight your primary Microsoft Exchange account (usually the top account in the list) and then click the Change… button. A Server Settings dialog box will appear. In the lower right you should click the More Settings… button.
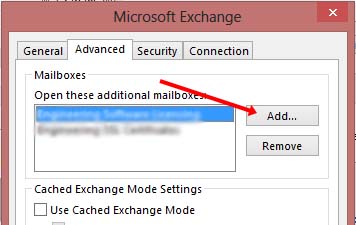 The Microsoft Exchange dialog (pictured) should appear. In the Advanced tab click the Add… button in the Mailboxes section. In the Add mailbox dialog that now appears type in the display name, alias, or primary email address of the shared mailbox and click the Ok button. You can now confirm that the new mailbox was resolved by the server and click Ok to save the changes in the Microsoft Exchange dialog.
You are now effectively done with the changes but have to work your way back out of the configuration changes by clicking the Next and then Finish buttons in the Change Account screen. Finally, Close the Account Settings page to get completely back to your Outlook client. A connection to the new shared mailbox should be established and listed under your main account in the folder pane.